

Navigational Plan and User Guide for – Avalara Sales Tax Integration with netFORUM Enterprise
Contents:
- Avalara: Identify Product
- netFORUM: Adding a Tax Code.
- netFORUM: Adding a Business Unit Tax Price.
- netFORUM: Testing Tax Code and Price.
- Inventory Module.
- CRM Module.
- netFORUM: Committing Tax to Avalara.
- netFORUM: View the Result of Scheduled Task.
- Avalara: View the Result of Scheduled Task.
Avalara: Identify Product
1 To begin, select a product that has been set-up and note the Item and Tax Code.

netFORUM: Adding a Tax Code
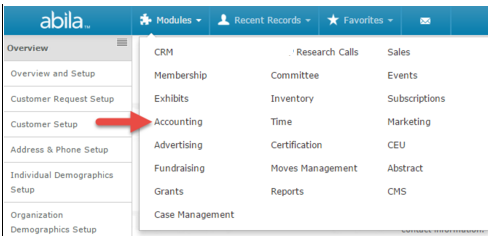
1 After logging into netFORUM, click on the Modules menu and select Accounting from the dropdown menu.
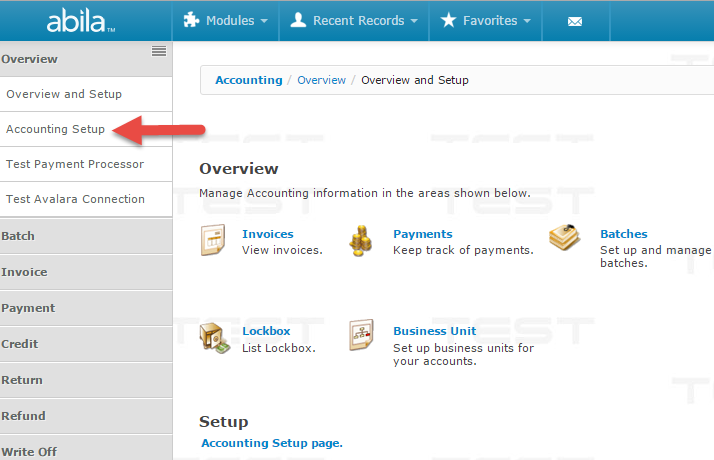
2 On the sidebar menu expand the Overview section, then select “Accounting Setup”
3 Scroll down to the BNE Tax Code child form and click the add button

-> Note: If you are uncertain if the tax code exists, open the form to review:

2 A Pop up box will appear to add the Tax Code.
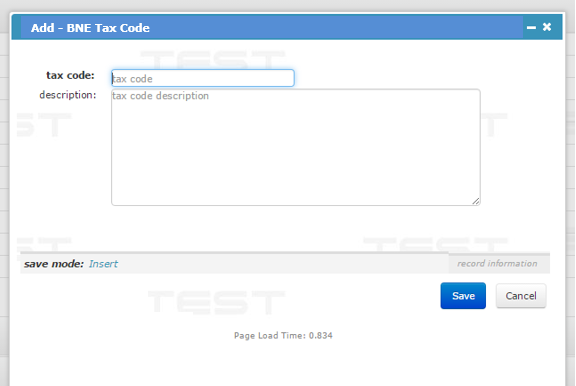
- Tax code: Use the code as listed in Avalara
- Description: I.E.: “Tax code for product 1111”
- Click Save
netFORUM: Adding a Business Unit Tax Price
1 From the current screen (Accounting Setup), scroll down to the BNE Business Unit Tax Price child form and select add to create a new tax price for your business unit:
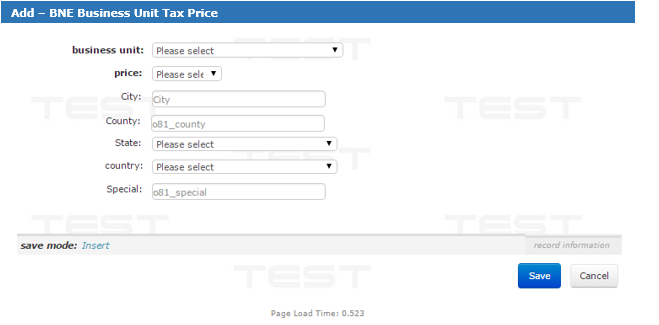
- Business Unit: This will provide a dropdown based on the Business Units set-up in Accounting > Overview > Business Unit
- Price: Auto-populates based on Business Unit.
- City and County: Free text, Optional contingent on Tax Type
- State: A dropdown will appear once the Country has been entered.
- Country: Dropdown Menu
- Special: Free text, Optional
netFORUM: Testing Tax Code and Price
Inventory Module
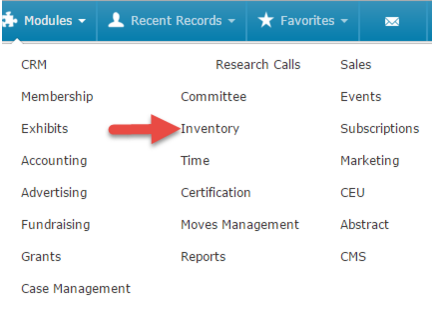
1 Navigate to the Inventory module by selecting “Modules” and clicking “Inventory.”
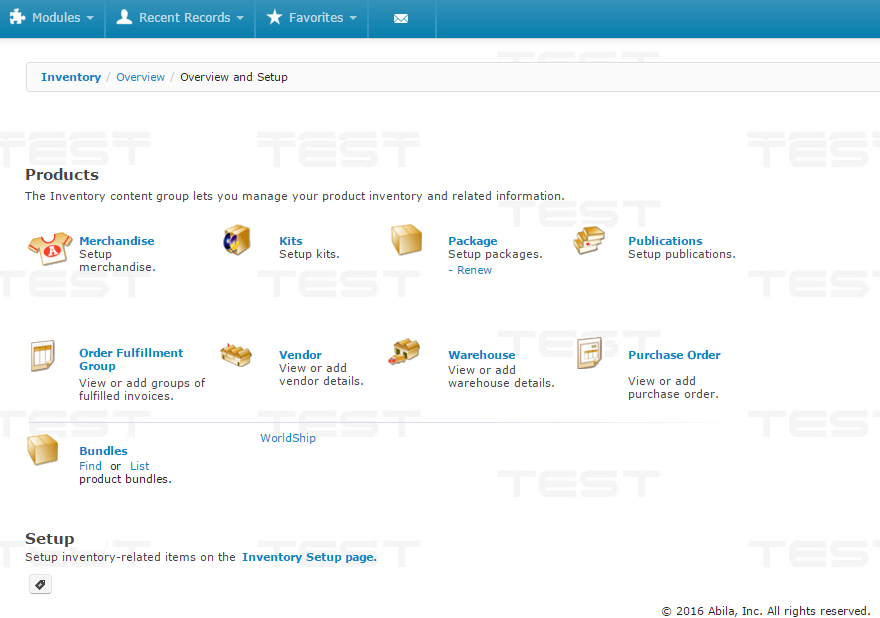
2 In the Inventory Overview and Setup Screen, Select the Products you have set-up; Merchandise, Kits, Package, etc.
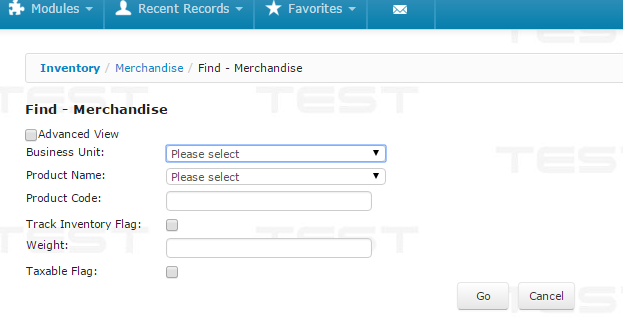
3 Search the Item Code (from Avalara) as the Product Code and click “Go.”
- You may also search for the product by any other fields displayed below. It will provide a list for the parameters selected.
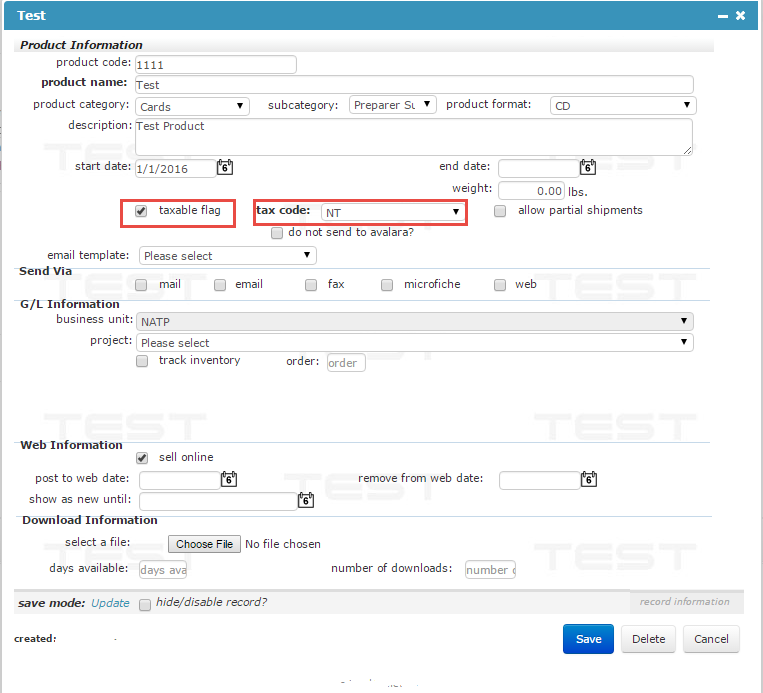
4 The Profile of the product will appear. Click the “Edit” button on the profile box.
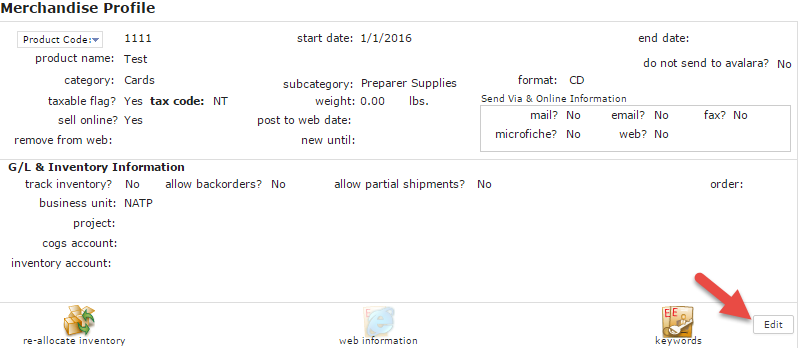
5 If it is not already checked, check the “taxable flag” and set the tax code.
CRM Module
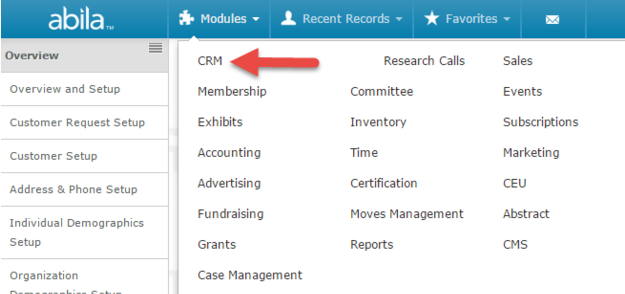
6 Navigate to the CRM module by selecting “Modules” and clicking “CRM.”
7 On the sidebar menu, expand the Individuals section. Then select “Find Individual” and enter the search criteria to find the individual you wish to test with.
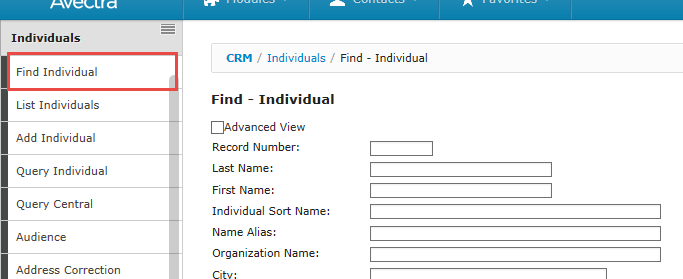
- If the search criteria apply to more than one record, a list of individuals will appear. Click to select the specific record.
7 From the Individual’s Profile Page, click on the “Invoice” button to create an Order Entry.

8 The Centralized Order Entry Form requires the following:
- Select product(s) in the Actions Section.

- Add the taxable item from above to the Order Entry in the “Product Code” Field.
- If you click enter at this time, the Quantity will default to “1.”
- Once you select the product, the tax will be calculated on the product.
- Click tab or move to the “Quantity” field and update to the proper amount.
- Note: The tax will change based on the quantity you enter.
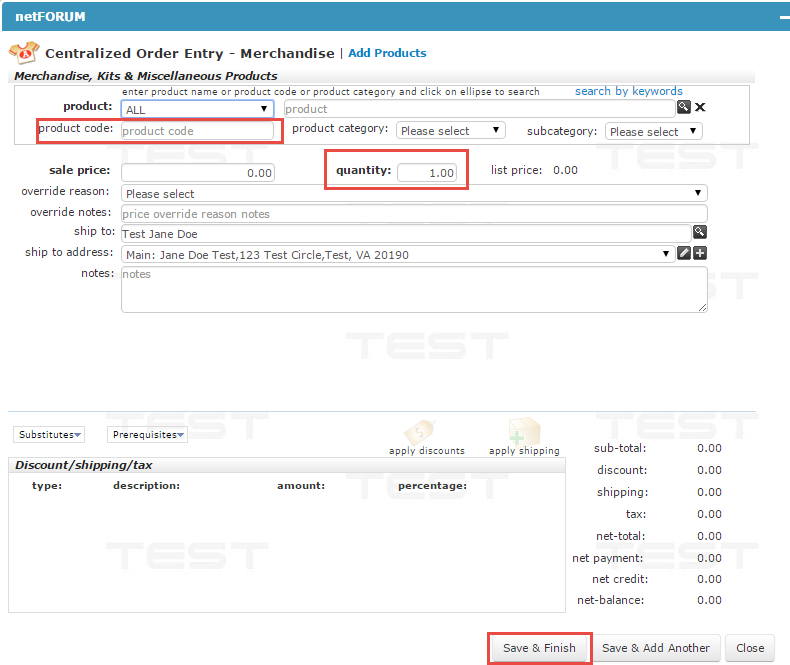
9 You may select to “Save & Finish” if this is the only product for the order or “Save & Add Another” if there are multiple products.
- If you no longer want to create an order, click “Close.”
10 Upon saving, the newly populated Centralized Order Form will appear.
11 Enter the Media Code, Batch, Invoice Type and Payment Details associated for this order.
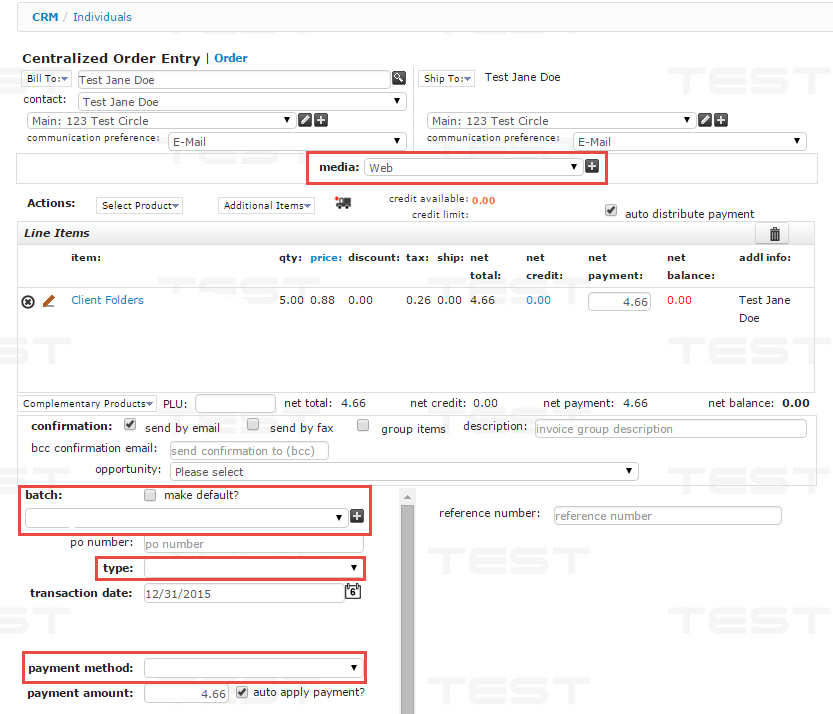
12 Complete the order entry by clicking the “Save” button at the bottom of the page.
13 Upon order completion, the tax has been calculated for the invoice, but it has not been committed to Avalara.
netFORUM: Committing Tax to Avalara
The nightly scheduled task will be responsible for committing the tax information. To test the scheduled task you can create a one-time task.
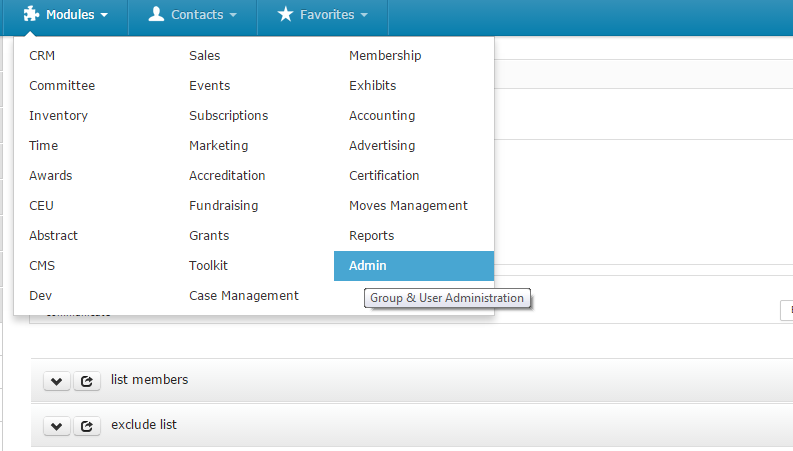
1 Click on the Modules menu and select Admin from the list.

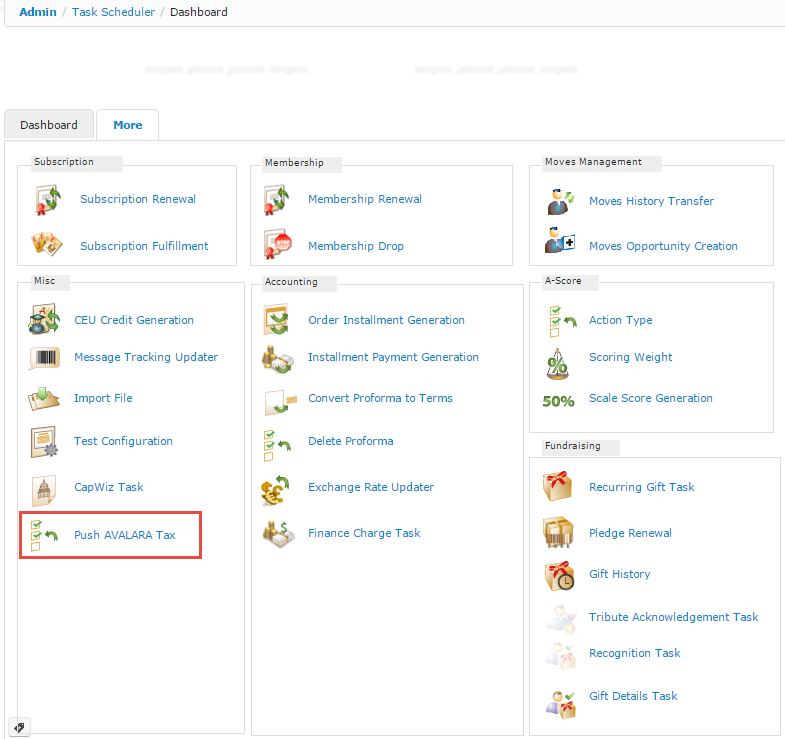
2 On the Admin Page expand Task Scheduler section and select Dashboard.

14 Select the “Push AVALARA Tax” task on the Misc. section of the Dashboard.
15 Choose “Now” for the run task datetime and set the recurrence to “Once”.
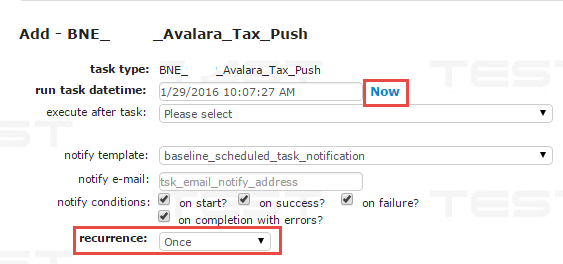
- Note: The earliest run task datetime is five (5) minutes from the current time that defaults.
- Execute After task: Select if applicable
- Notify template: Dropdown that will select the notification template that will be sent via email.
- Notify email: The email address that will receive the task notifications
- Notify Conditions: On Start, Success, Failure and/or Completion with Errors
- Recurrence: Once, Daily, Weekly, Date of Month, Week of Month
The process will run 5 minutes from the time you click “Now”. Once it does you can log on to Avalara and see that it has been committed to the data by filtering the Transactions by “Committed” or by filtering Doc Code as the Invoice Code.
netFORUM: View the Result of Scheduled Task
1 Click on the Modules menu and select Admin from the list.
3 On the Admin Page expand Task Scheduler section and select Find Scheduled Task from the list.
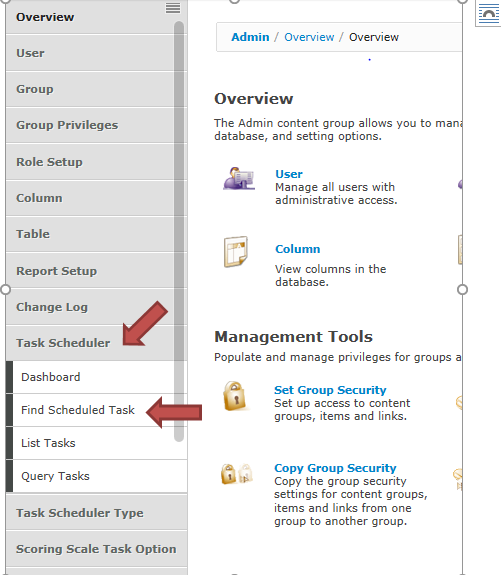
4 Enter the task name “BNE Avalara Tax Push”, then click Go.
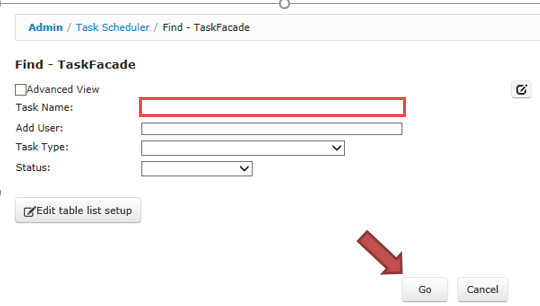
5 Click on the task.

You can see the task status and the history
6 You can see the task status and the history.
IMAGE
Avalara: View the Result of Scheduled Task
Sales Invoice

Push Return
